
Chocolate & caramel 50th birthday cake
As much as I love playing with fondant, sometimes it’s nice to step away from the fiddly little details and go back to basics – although there’s really nothing ‘basic‘ about this cake.
A friend’s husband is celebrating his 50th birthday this week, and after a bit of deliberation, we settled on a simple design that highlights the big five-oh and combines good ol’ chocolate with ooey, gooey caramel.
On with the recipe:
For the cake, I used my go-to chocolate cake recipe (for step-by-step instructions on the cake and buttercream, go here).

I baked it in 3 8-inch round pans, which has lately been my preferred cake size for standard round cakes: they cake layers are the perfect thickness and the cake a good height, tall enough to be impressive without being too bulky or produce unmanageable slices.
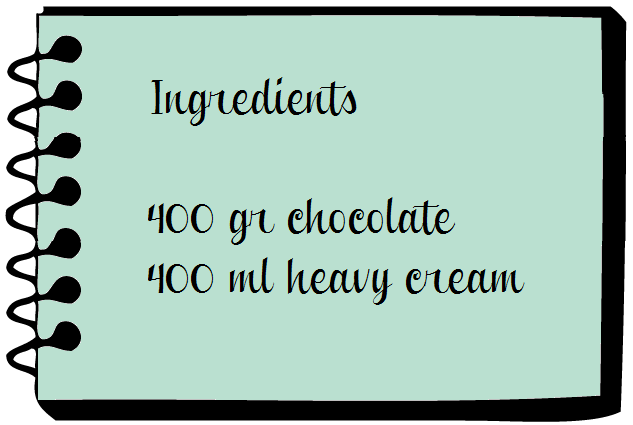 For the filling, I alternated between chocolate and caramel for each later. Half the layers were filled with chocolate ganache.
The recipe is as simple as it gets, and all you need to be mindful of is making sure all the chocolate is melted down into the hot cream, and leaving it to cool (preferably overnight) so it’s nice and set and of spreadable consistency.
The remaining layers were filled with a combination of ooey, gooey caramel sauce and buttercream that was flavored with both chocolate and caramel.
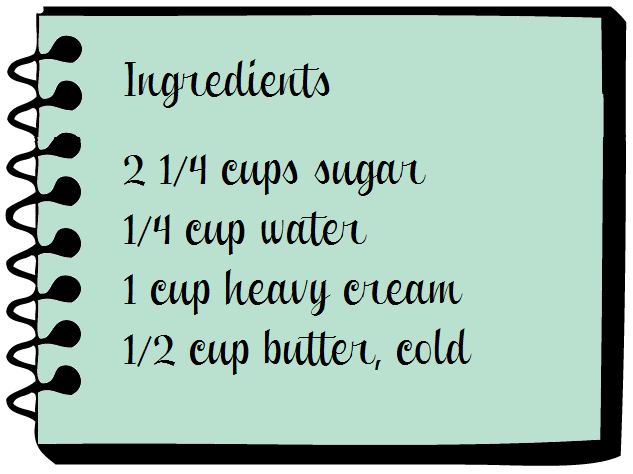 For the caramel, place your water and sugar in a medium sized pan and set it on high heat. Give it a stir before it comes to a boil, then leave it alone until the color turns to golden. Swirl it gently around if it looks uneven to prevent it from burning.
When it turns a nice, deep amber, remove from the heat and stir in the cream. Most recipes will tell you to heat your cream but I rarely do that and it always turns out great.
The caramel will bubble up and there’ll be a lot of steam, so wait for it to subside a few sends, then start stirring with a wooden spoon or silicone spatula.
Return to the heat and keep stirring until it’s a lovely, smooth caramel sauce. When it’s done, remove from the heat and stir in the cold butter, adding a cube at a time and stirring until it’s emulsified into the mixture. Once all the butter is in, set aside to cool (again, preferably overnight).
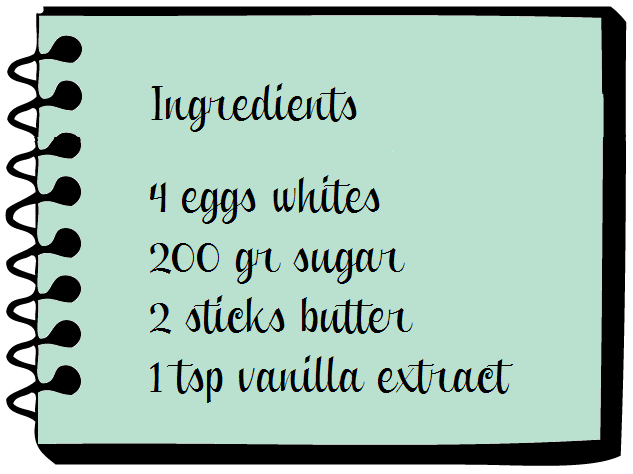 For the buttercream, I whipped up a batch using this recipe, then folded in 1/2 of the (cooled) chocolate ganache and another 1/2 cup of the (again, cooled) caramel sauce. You could leave it plain or add just one or the other, but I liked the combo and the color was exactly what I was looking for.
Transfer about 1 cup of the buttercream into a piping bag, either fitted with a large circle nozzle or just with the tip cut off, and set the rest aside.
Time to actually build the cake! You’ll also need some simple syrup, which is just equal parts of sugar and water boiled together and then cooled. I always make more than I need and keep the leftover syrup in a squeezy bottle in the fridge for ease of use.
Slice your cakes into layers using a large serrated knife (or a cake leveler) and drizzle them with the syrup. Place the first layer onto your board and slather it with chocolate ganache. Next layer gets the caramel treatment: pipe a ring of buttercream around the perimeter of your cake and spread a generous dollop of caramel sauce inside the ring, pushing it all the way to the buttercream with a small offset spatula (the other border of buttercream will ensure that the caramel won’t ooze out of your frosted cake0. Pipe some more buttercream on top and smooth it out, then repeat this process alternating between the chocolate ganache and caramel filling until you’ve used up all the chocolate and the buttercream in your pastry bag.
Next, it’s time for the crumb coat: add a dollop of buttercream on top of the cake and work it around and down the sides, making sure it’s smooth and all the crumbs are locked in. Refrigerate for 20-30′ and then give your cake its final frosting layer with the rest of the buttercream, scraping the excess off with a large spatula or a bench scraper.
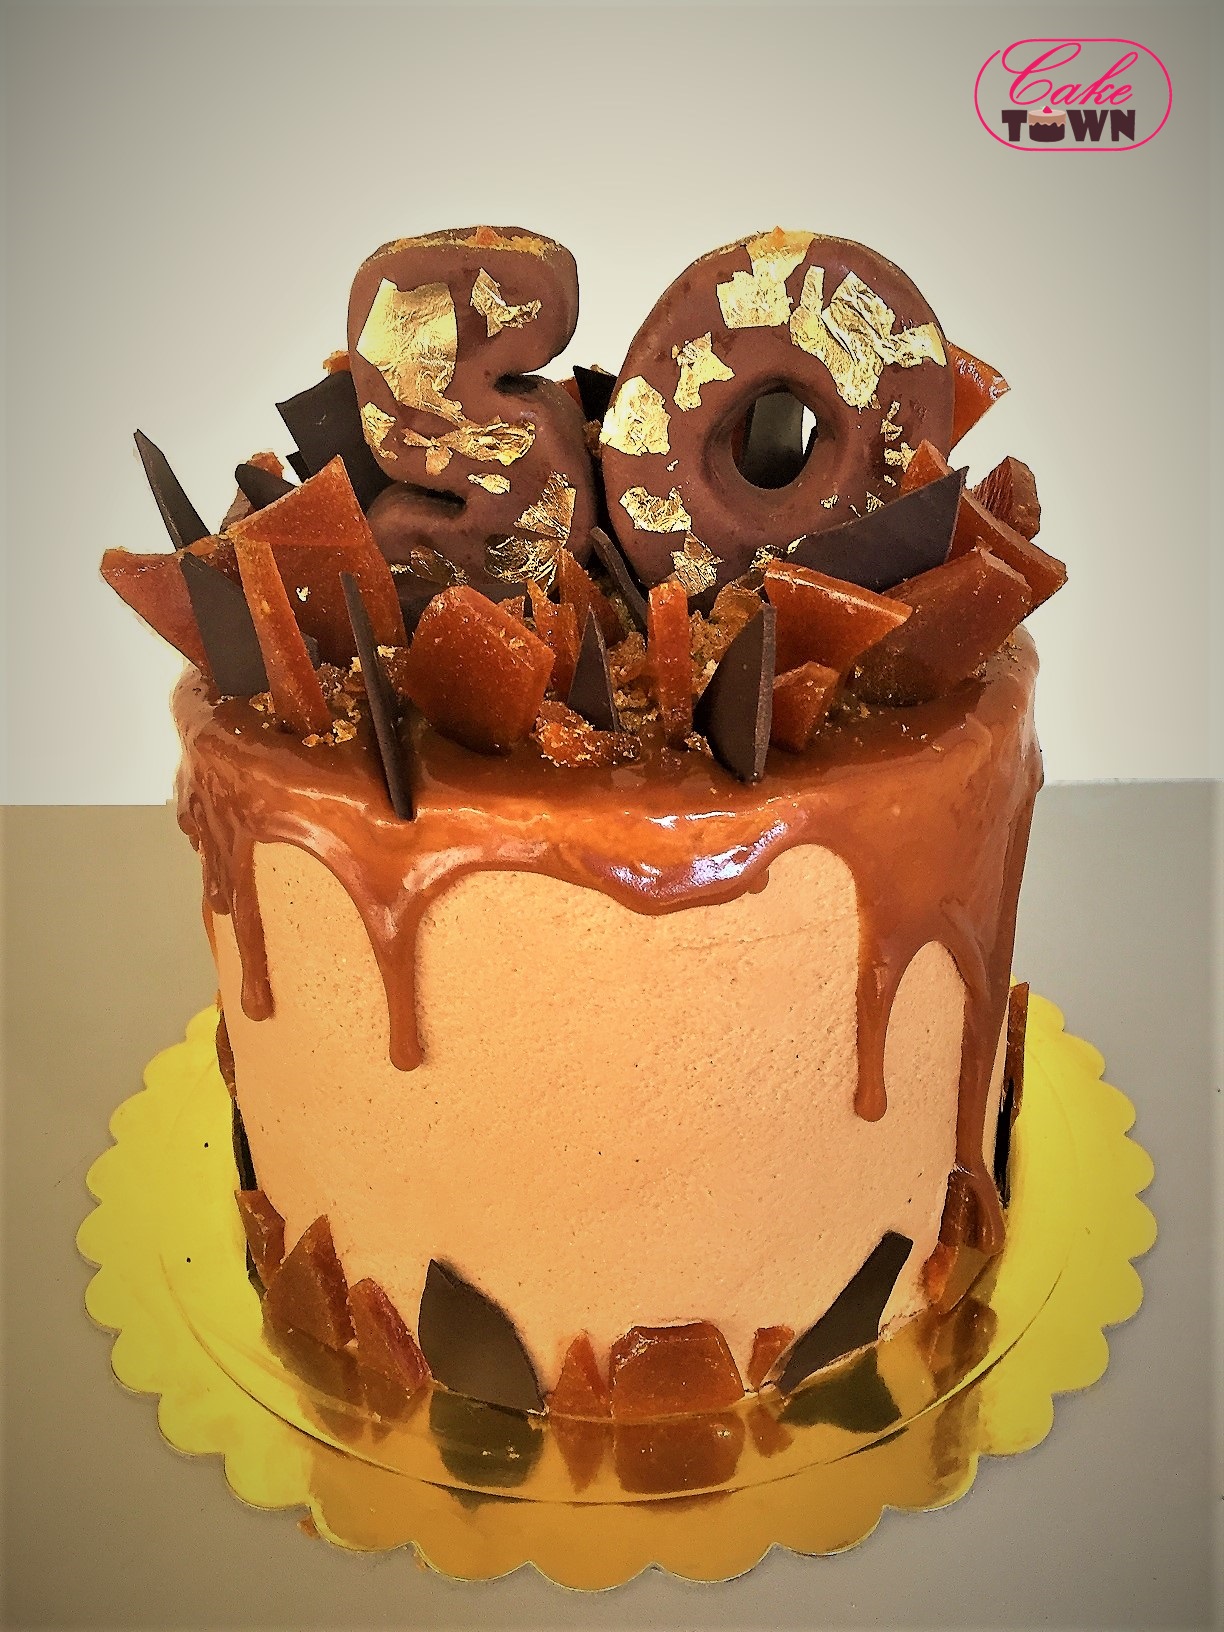
For the decorations, I used the rest of my caramel sauce and drizzled it on top of the cake, pushing it all the way to the edge with an offset spatula to create a drip effect. I also decided to go a bit overboard with shards of caramel (just sugar melted over high heat and spread onto a sheet of parchment until it’s cool, then shattered into chunks) and tempered chocolate, but you could use any chocolate/caramel bar for a similar effect.
Finally, for the number 50, I prepared a small amount of rice crispy treat mixture and pressed into my number-shaped cookie cutters. I frosted it with a bit of ganache to make it smoother and to help the fondant adhere, then covered it with chocolate fondant and let it harden. For a shiny final touch, I added gold leaf and secured it onto the cake using toothpicks.
And voila, a scrumptious cake for a 50th birthday celebration!
About telethonrunner
11 comments on “Chocolate & caramel 50th birthday cake”
Leave a comment

Recent Comments
| telethonrunner on Dark Unicorn cake | |
| telethonrunner on Goji berry jam | |
| bertha king on Goji berry jam | |
| telethonrunner on Old-fashioned Serano Cake | |
| Michelle J on Old-fashioned Serano Cake |

This is truly amazing you are super talented!!
Thank you! ❤
Pingback: chocolate & clementine 60th birthday cake | that baker girl
Pingback: J’ adore… cake | that baker girl
Pingback: Unicorn extravaganza! | that baker girl
Pingback: Cocker Spaniel cake | that baker girl
Pingback: Neapolitan cake | that baker girl
Pingback: Superhero cake | that baker girl
Pingback: Chocolate & Caramel drip “29th” birthday cake | that baker girl
Pingback: Record Player cake | that baker girl
Pingback: Elephant cake | that baker girl